Editor Guide
Unique Pixel Editor
When creating our app, we packed in as many smart features as possible to make your project truly one of a kind.
Don’t like certain details? Use the built-in editor! With it, you can change the shade of individual pixels or entire groups, creating your own unique Mozix masterpiece.
Your project will not be uploaded to our server for analysis.

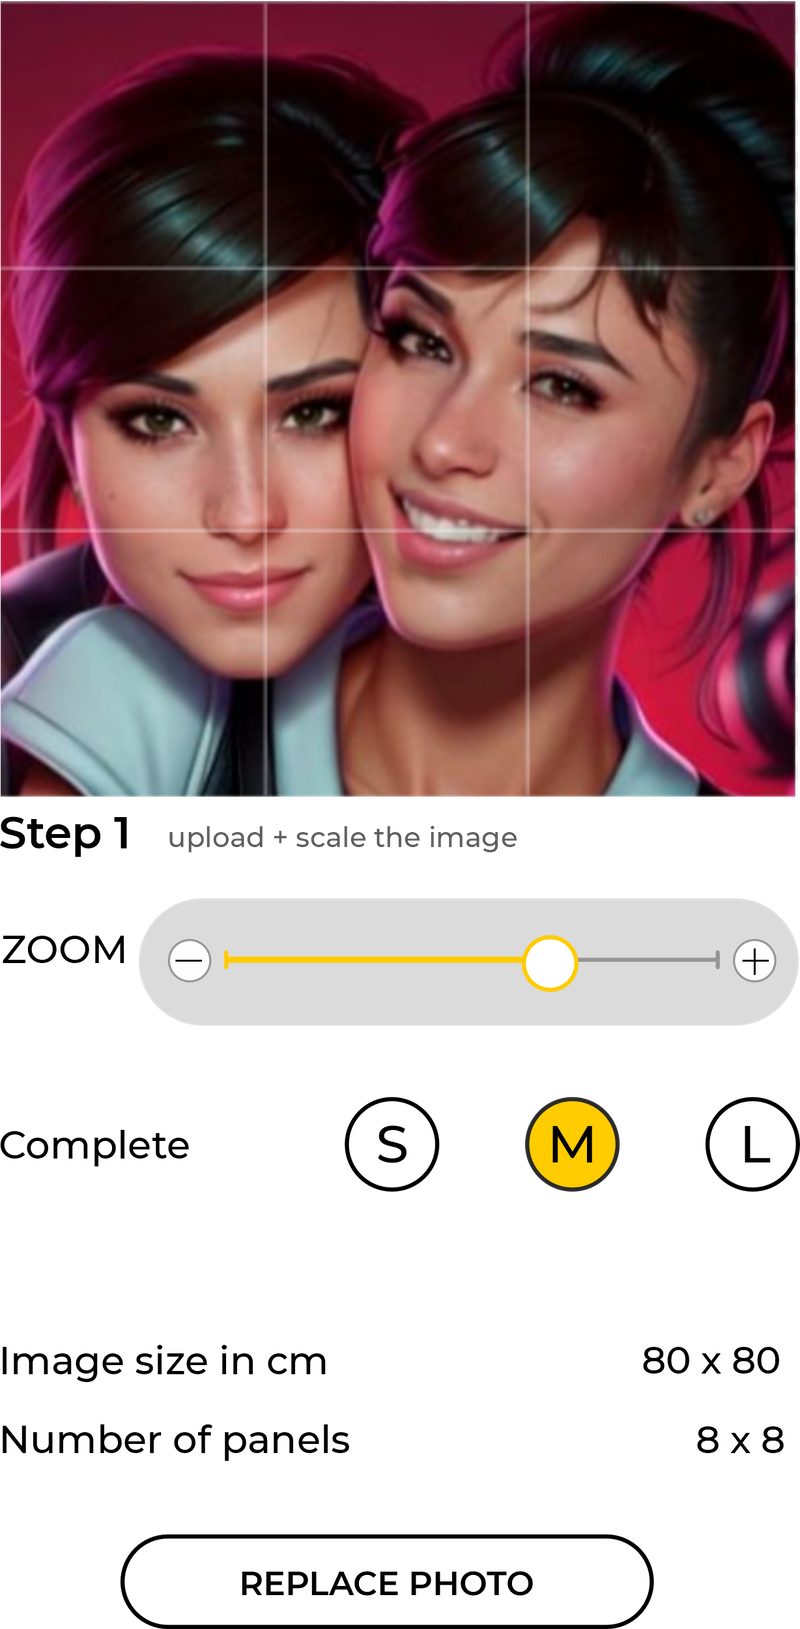
Step 1
Upload & Scale Your Image
Before you begin, take a moment to check our guidelines for selecting an image:
«Image Selection»
The app accepts JPEG or PNG files up to 10 MB.
After uploading your image, select the area you’d like to use for your mosaic. Simply place the selection box over the desired part of the photo and drag the lower-right corner to adjust the size.
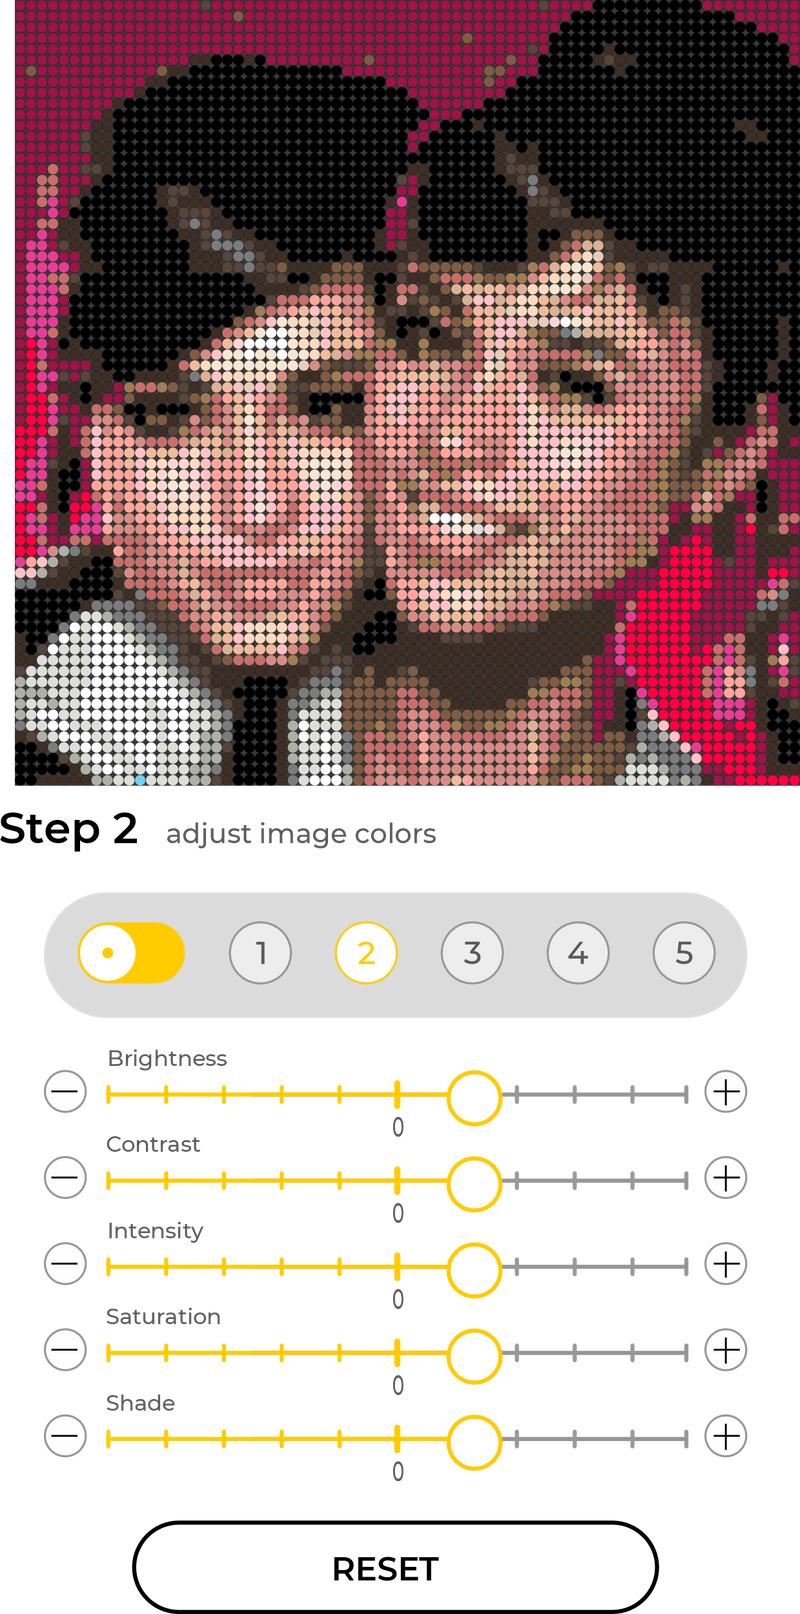
Step 2
Filter & Color Adjustment
At this stage, your uploaded image is pixelated and transformed into a mosaic format. Here you can fine-tune filters and adjust colors to achieve the best look for your future artwork.
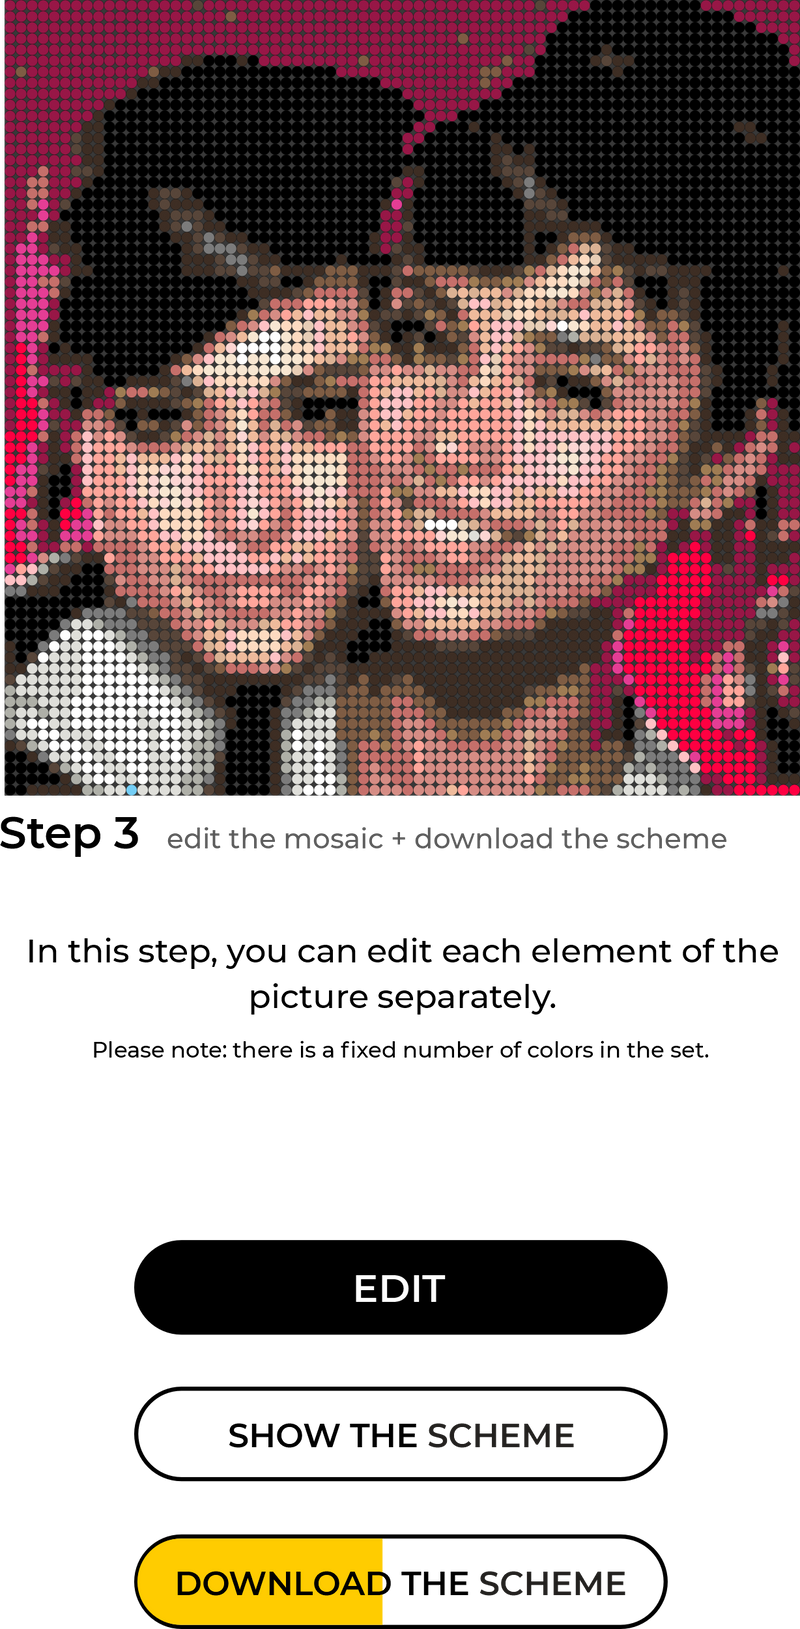
Step 3
Pixel Editor & Assembly Guide Generator
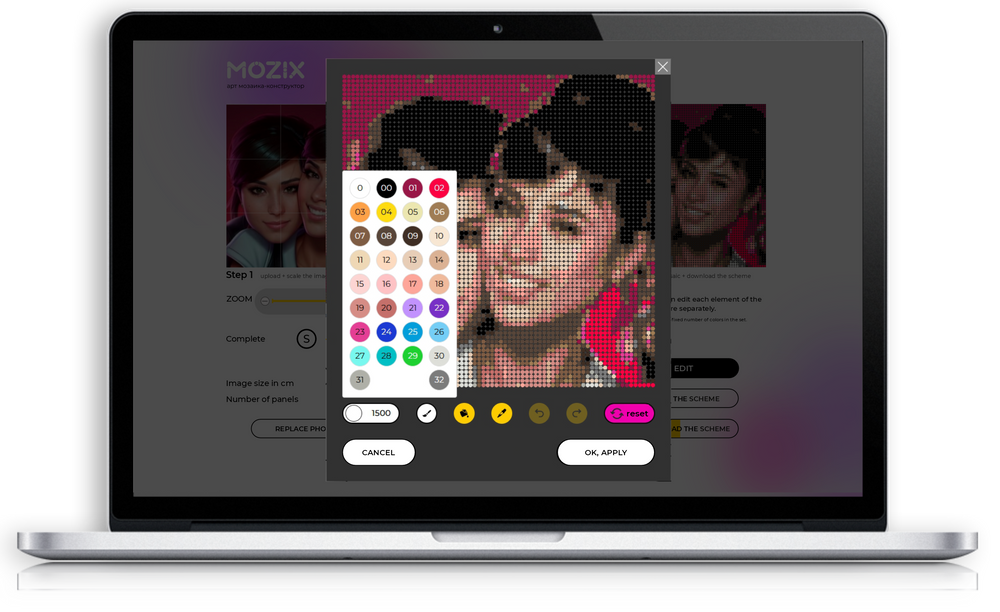
Use the built-in editor to change the color of any pixel and create a one-of-a-kind image. Once you’re satisfied, the app automatically generates a step-by-step assembly guide for your mosaic.
Step 4
Edit Your Image
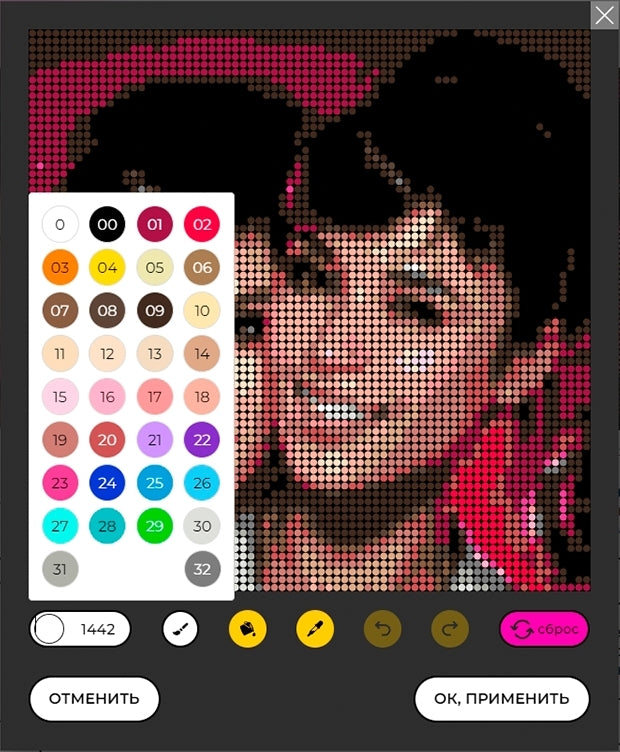
The Pixel Editor is a unique tool that lets you fine-tune every single pixel with precision.
It automatically tracks how many pixels of each color are used in your project and calculates the remaining pieces.
If your design requires more Moziks than the set includes, the editor will suggest alternative shades.
And if you want to keep every detail exactly as planned, you can simply purchase an additional Moziks pack to complete your artwork.
 Brush - pixel coloring
 Fill is the process of painting a group of pixels of the same color.
 Eyedropper - copying the pixel color